It’s a no-brainer why you want to start a blog.
After all, how many other things are there where you can write about what you want when you want, be your own boss and get paid for it?
And not only can you get paid, but there are bloggers out there earning serious money. With people making tens of thousands of dollars every month – if not much, much more in some cases – it’s no wonder so many of us see starting our own website as a great thing to do.
Sure, you’re not going to start earning that kind of money on the day you launch your blog. It’s important to understand that it can take some time to build your site and your audience up to the amounts that you’re probably dreaming of.
But as corny as it sounds, every journey really does begin with a single step. And by following this step-by-step guide on how to start a blog, you’ll be marching down the path to your successful site in no time.

One more thing: You don’t need to know how to code or have any sort of tech background in order to start your blog. I absolutely didn’t.
And even without any of that, the steps below will easily take you less than 20 minutes to do. Which means, as you’re reading this, you’re 20 minutes away from carving out your own little corner of the internet!
1. Choose your website’s host
A host is the company that provides all the storage for your blog’s files, making it like your blog’s hard drive. This includes any posts, pictures, code etc. that you show on your site. This means that without a host, you won’t have any site to show the world.
It also means that having a good host can make or break your site’s success. This is largely because a better host will allow other people to see your site faster. And as you probably know if you’ve ever used the internet, a faster site generally means a better site.
Another critical point is to pick a host with excellent customer support. I cannot tell you the number of questions I had when launching my own site, not to mention all the great times when I somehow broke my site and thought all my work was down the drain. Super fun, as you can probably imagine.
Fortunately, having reliable customer support on hand has been a lifesaver. Being able to talk to someone at any time of the day or night at the other end of a chat box who knows what they’re doing is so reassuring – and also makes sure that any problems are fixed ASAP so that your site is back up and running before you know it.
Finally, you want your host to be good value for money. As a beginner blogger, you don’t want to spend a fortune on your host – and there’s really no need to.
My top pick for the best host for beginner bloggers
It’s for all these reasons that I recommend you use Bluehost.
Here’s why:
- The easiest host for starting your site – I’ve tried a few and, hands down, Bluehost has been by far the best for someone just starting out. Sure, there are more technical hosts out there which will be better for you later on once your site starts growing, but at the beginning, no one can beat Bluehost for how easy they make it to launch your website.
- Free domain name – A domain name is simply the address of your website, with many hosts requiring you to buy your own domain name. Bluehost, however, includes it for free.
- Free SSL – This makes sure your site is secure. See in the address bar at the top of this page how there’s a lock next to the site address? That’s how you know this is activated.
- 24/7 support – Any time, day or night, you can jump on the chat function or call them to ask any questions you may have about your blog.
- Free email addresses – You’ll get up to five email addresses for free that are attached to your site. This really helps you to up the professionalism when you can write to people with a [email protected] address.
- One-click WordPress install – As I’ll show you below, this makes the process of launching your site infinitely easier.
And if you sign up with Bluehost at our exclusive link here, you’ll lock in a massive 70% discount.
2. Pick your plan
On Bluehost’s main screen when you click this link to get access to our special rate, you’ll be given a few options for different web hosting plans. Just click the “Host Your Site” button to get on your way:
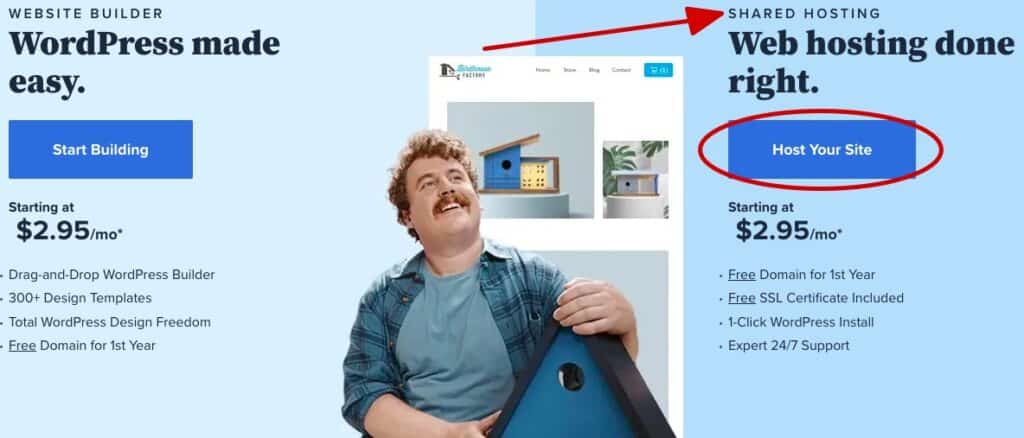
As you’re just starting out, it’s perfectly fine to go with the cheapest one as it’s really all you’ll need at this stage.
3. Choose your domain
The next screen you’ll see is the one below, where you can choose to either register a new domain or use one you may have already bought from a different site.
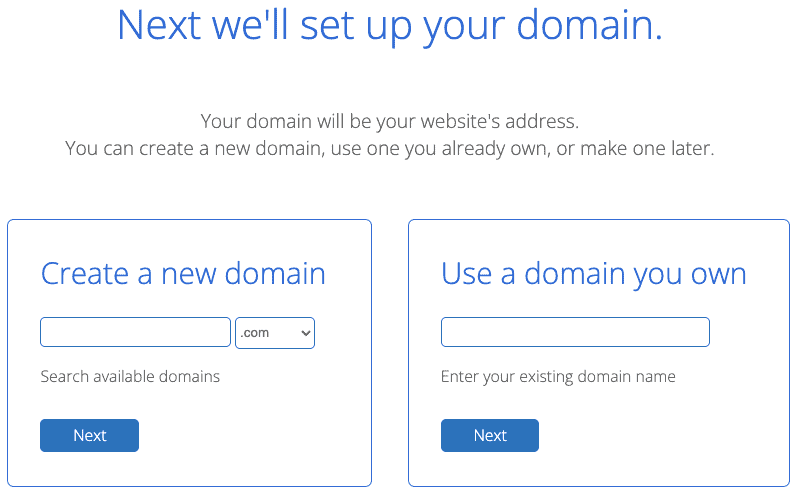
As mentioned, your domain is your site’s address – specifically, the part that comes after the “www”. In the case of the site you’re on at the moment, for example, the domain is “logicaldollar”.
So assuming you haven’t bought a domain already (and noting that it’s free with Bluehost), it’s time to pick your site’s name!
You can make your domain whatever you want, as long as it’s not taken already. That said, I’d recommend you keep a few things in mind when choosing yours:
- Keep it fairly short and simple. You want something that people will remember and not misspell because it’s too long or too complicated.
- Don’t use words that could be mistaken for other words. Your domain name might sound clever in your head, but having to continually explain it to people or clarify that “no, it’s not that, it’s actually this one” will get tiring fast.
- You don’t have to use words that relate to your blog’s topic. In my case, “logicaldollar” clearly suggests there’s something about money involved, but it’s really not needed for your site to be successful. After all, what does “google” have to do with searching or “twitter” with short messages?
- Check that the main social media handles are available for your domain. It’s always good to lock down your new site’s social media handles even if you’re not sure if you’ll be using social media. So check these haven’t been taken at least on the main sites like Facebook, Instagram and Twitter.
- You don’t have to stick with “.com” but it’s what people know. That is, there are plenty of authoritative sites that end in .org or .co, but it’s also true that most people consider .com sites as being the most reputable. This means that if you can get a domain with that ending, it may be better.
Once you’ve found an available domain name you’re happy with, it’s time to continue!
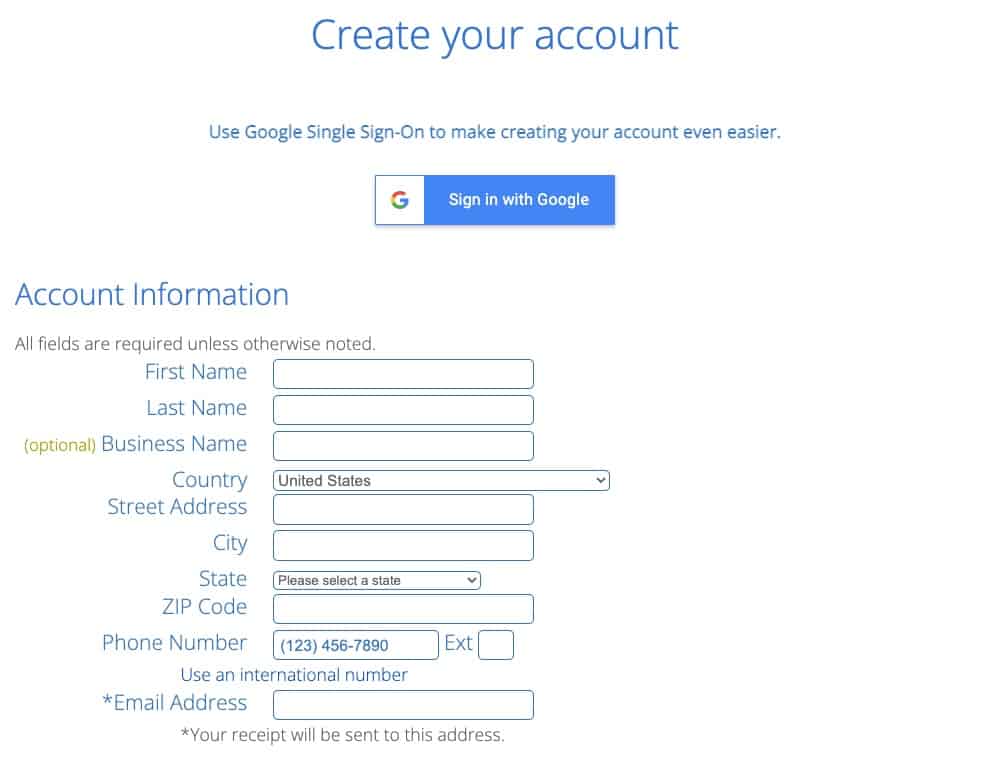
4. Fill in your account information
This is very straightforward – simply add your details:
5. Select your package
Scroll down the page a bit and you’ll then be asked to select the various aspects of your package:
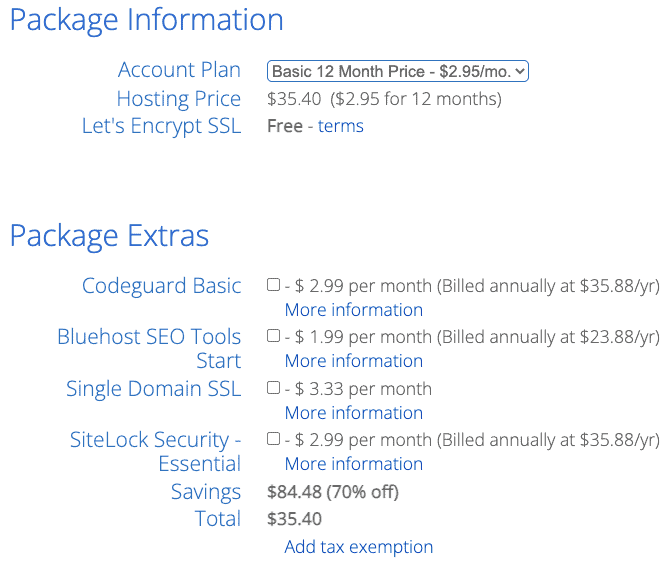
You can just select the 12-month option at the first dropdown if you like, rather than locking yourself in for a longer period, although it’s totally up to you.
Once you’ve picked the length of time, you’ll then have a few other options to select, as you can see in the picture. Just ignore all of them, as they’re not needed at this stage.
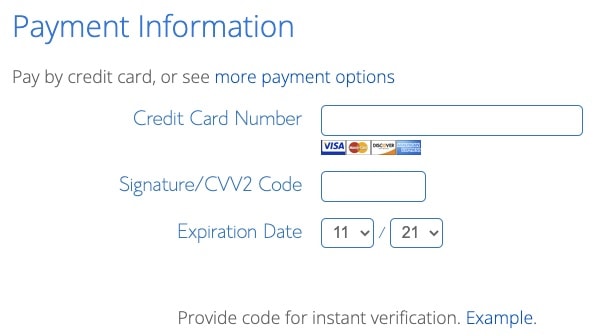
6. Time to pay
At this point, it’s time to pull out your bank card.
Ugh, I know, but it had to come eventually. But just think – do you know of any other business that only costs around $36 to start? Especially when you start to see just how much you can earn doing this!
7. Install WordPress
So you’ve paid and you’re into your Bluehost client area. Now the fun part starts!
First things first: WordPress is the platform where you actually build your blog.
Importantly, it’s also the best option for anyone who’s serious about making money from their blog. Other platforms have limitations on monetizing sites built with them, such as putting their own ads that make them money instead of you.
Bluehost makes it insanely easy to set up your new WordPress site. Just follow each of the steps below.
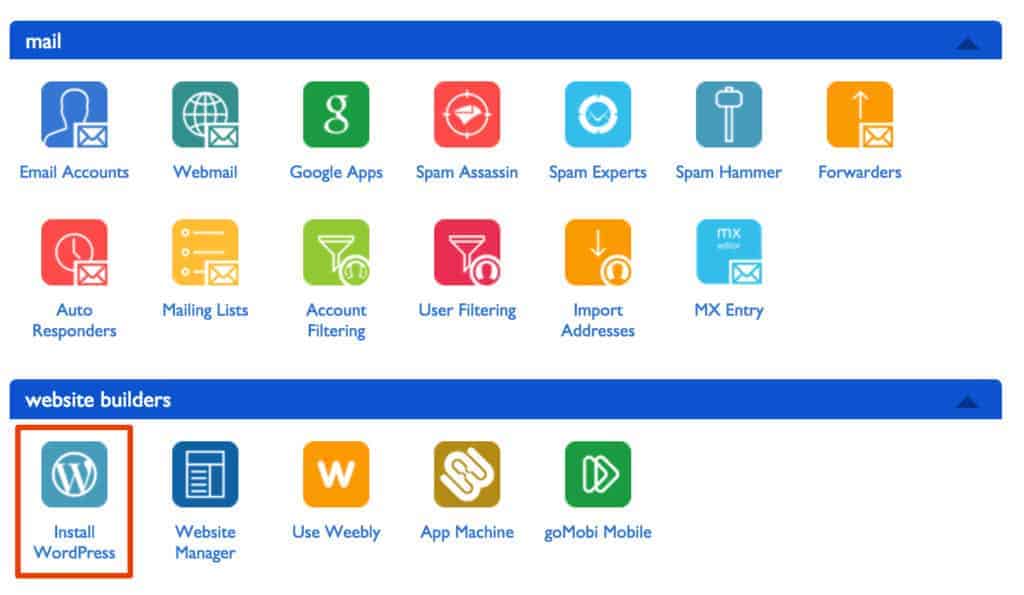
Step 1: Go to your cPanel, which you can access from the top menu bar as follows:

Step 2: Once you click that, you’ll see a screen of different icons. Click the “Install WordPress” one.
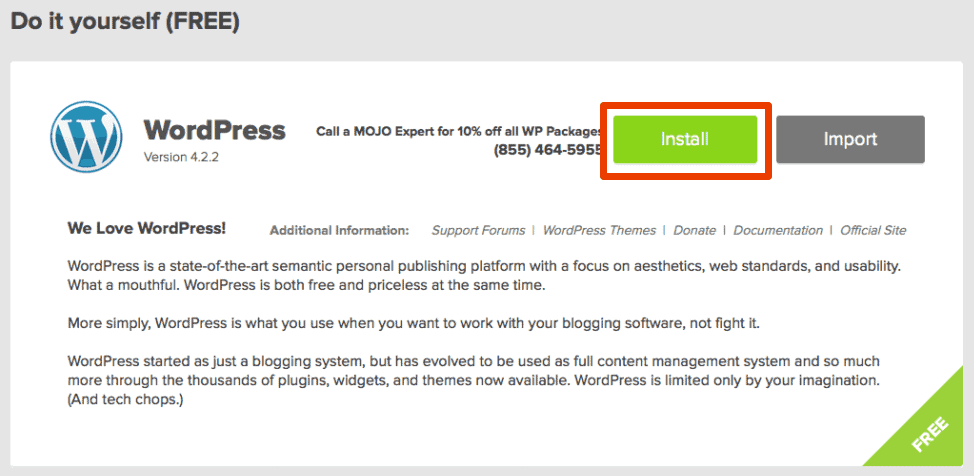
Step 3: The following prompt will then appear, at which point it’s time for you to click “Install”:
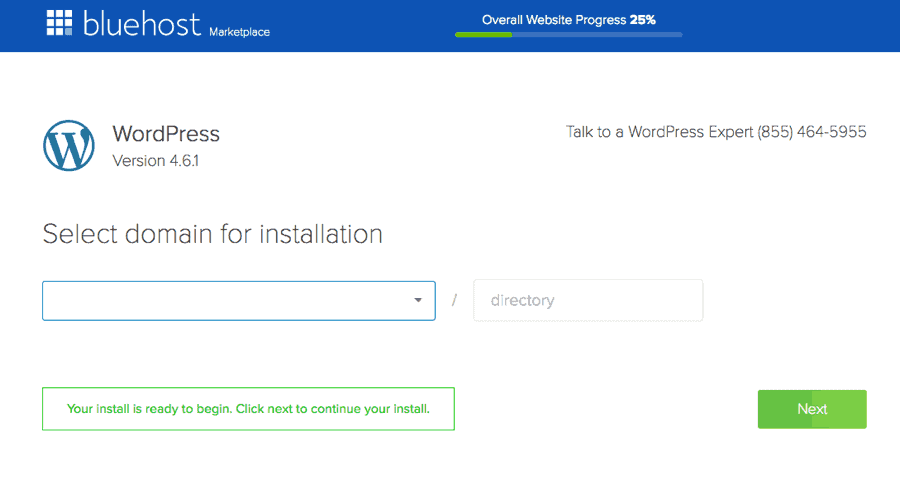
Step 4: The following dropdown will appear, where you can select the domain you chose earlier:
Step 5: WordPress will work its magic and in just a few moments – voila! You have your very own shiny new site!
8. Select settings
You’ll then be prompted to fill in certain information, as set out below.
Site Settings
The next section on the WordPress page is “Site Settings”. There, simply enter the name of your site and its description, which is essentially its tagline.
Admin Account
This is an important security step, as it creates the setting for the main admin account for your site. This is the account that has full control over your site, including being able to delete everything if needed.
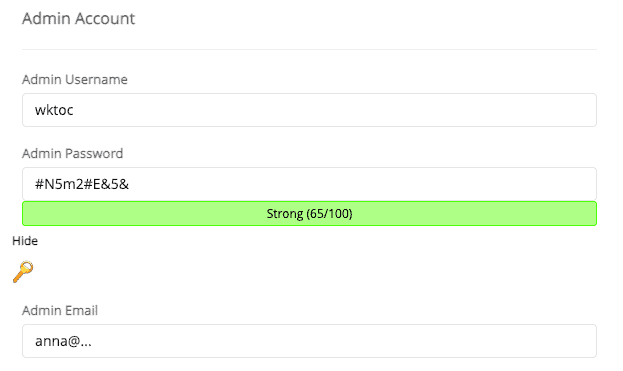
This means that you really don’t want someone being able to hack into this, so your first step should be to create an admin username that isn’t obvious. That is, don’t make it “admin” or your domain name as people will be able to guess that.
Similarly, make sure you have a really secure password.
Then put in your email address for this account. You can always change it later, including if you make a site-specific address (which we’ll cover later on).
Choose Language, Select Plugin(s) and Advanced Options
Pick which language you want your WordPress to be in – note that this doesn’t have to be the same language as your site, if you plan to blog in a different language. It’s just which language you’re most comfortable using behind the scenes.
They’ll then give you some plugins to select, but leave these blank as they’re not needed.
You’ll then be shown some “Advanced Options”. You should also leave these alone.
Select Theme
You’ll be shown the following at the section “Select Theme”:
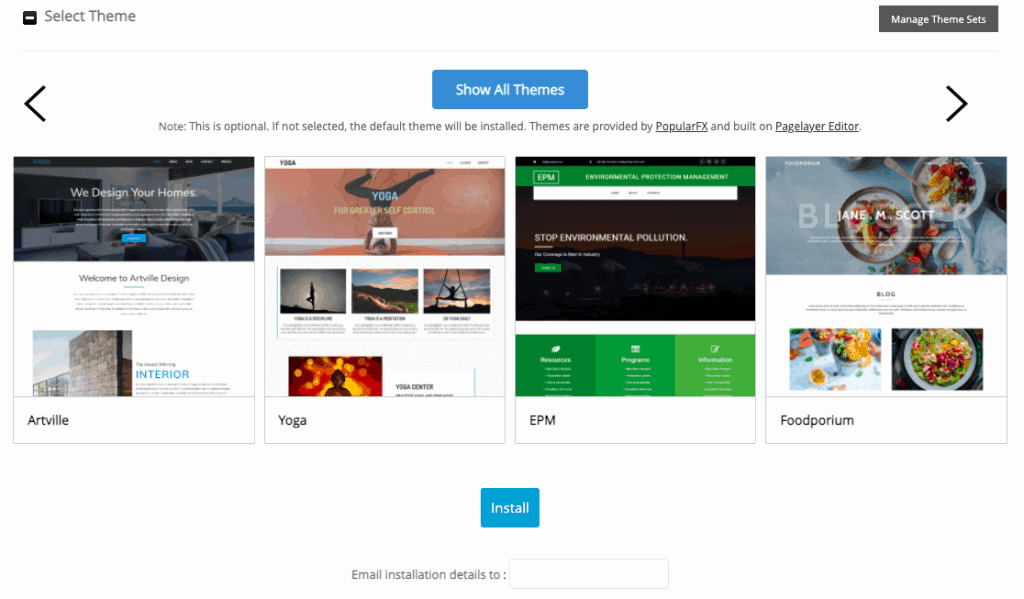
Your site’s theme is what your site will look like when someone visits it and Bluehost has a bunch of pre-designed themes you can install if you want. However, I’d recommend skipping this for now – there are some different options you can consider instead in a few minutes.
Instead, go past this to the final button: “Install”. If you want, you can also choose to email your WordPress installation details to someone but if you do this, make sure it’s someone you trust.
You may also be interested in: 40 Best Blog Fonts (That Look Great and Load Fast)
Congratulations screen
The install process may take a half a minute or so to go through. But once it’s done, you’ll see a screen congratulating you for successfully installing the software.
And this means: you’ve done it! Your site’s been launched!
To prove it, click the first link at the congratulations message, which should be your domain. You’ll be taken to a very empty looking site – but it’s your site!
9. Add a theme
Before you start publishing blog posts, it’s a good idea to install a theme so you can start working on the overall look of your site.
There are literally thousands of different themes you can choose from, but not all themes are created equal. While many of these themes look incredible, you always have to keep in mind your site speed.
That is, you don’t want a theme with files that are so big that it slows down your site, as that can negatively impact a whole range of things down the line.
It’s for this reason that I highly recommend you use the theme Astra.
(In fact, this is the theme we used to launch this site!)
It’s literally the most popular theme of all time with over 1.2 million sites using it. This is mainly because of just how fast it makes your site and how easy it is to use.
Not to mention that it’s FREE. Yes, really.
You can find out more about Astra here – but keep reading to find out how to install it.
Install Astra
In your WordPress dashboard (which is located at yourdomainname.com/wp-admin), click on “Appearance” in the menu on the left and then click “Themes”. You’ll see three or so standard themes with names that are the years they were released.
Instead of clicking one of those, select the “Add New” button at the top of the page. You’ll then see a new search box where you should type “Astra”.
Once the Astra theme appears in the search results, select “Install” then, once that’s done, select “Activate”. You’ll be automatically brought back to the “Themes” page from before where you’ll see the Astra theme there too now as the active theme on your site.
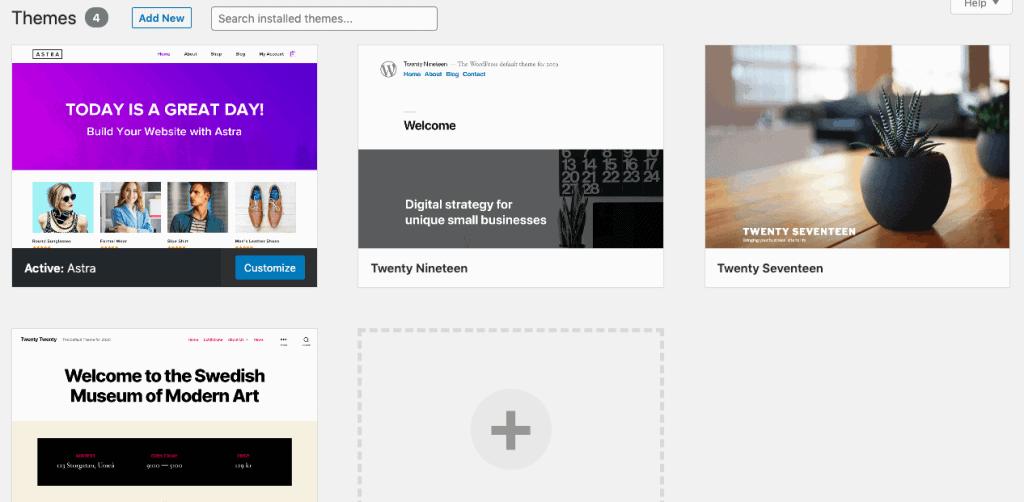
To test it out, visit your site – that is, go to www.yourdomainname.com. It should now look different from when you clicked it in the previous step, which confirms that you’ve successfully changed the theme.
It probably won’t look that impressive at this point but that’s ok, as there’s plenty of time for fixing all that. In particular, if you go back to the Astra site, the drop down menu has an option for “Starter Templates”.
Here, there are dozens of free pre-made site templates that you can look at to pick one that you can then customize to suit your own site.
Once you’ve found one you like, you’ll need to install the Starter Templates plugin through your WordPress dashboard in order to upload the template to your site and start making your own personal changes.
This page explains exactly how you can install that plugin and this article shows you what to do from there to import a template to your site.
10. Start blogging
Congratulations, your brand new site is live!
Remember how we said at the start of this article that your blogging journey begins with a single step (while acknowledging that this is probably one of the corniest sayings of all time)? Well, you’re well and truly on your way now!
(And it’s worth mentioning again: if you got stuck at any point, don’t hesitate to contact the Bluehost chat support team. They’re incredibly helpful and quick at responding.)

You can now start writing your first post if you want or upload some images…or do literally anything now that you’ve carved out your own little corner of internet real estate!
The very best thing you could do now though to make sure your site is successful ASAP is to start learning.
You know how we said at the start that there are bloggers earning six-figures from their sites? Those are the people you want to be learning from.
After all, they’ve made all the mistakes already while also seeing what’s worked with their own sites. So learning from them means you avoid spending time doing the exact same missteps.
A good example of this can be seen in the income reports produced by Jon Dykstra, which show him earning well over $110,000 per month from all of his blogs.
He also has a great free course at that link to get you on the way to doing the same!
And in the meanwhile: happy blogging!


